> For the complete documentation index, see [llms.txt](https://sharelink-docs.toss.im/llms.txt). Markdown versions of documentation pages are available by appending `.md` to page URLs; this page is available as [Markdown](https://sharelink-docs.toss.im/start/corporation.md).
# 법인사업자
법인 대표 유형에 따른 신청 방법과 준비할 정보를 확인해요.
법인은 **대표 본인의 계정**으로 신청해요. 먼저 대표 유형을 확인해 주세요.
| 대표 유형 | 신청 방법 |
| -------- | -------------------------------------------------------------------- |
| 단독대표 본인 | 고객센터 문의 없이 직접 신청할 수 있어요. |
| 각자대표 본인 | 고객센터 문의 없이 직접 신청할 수 있어요. |
| 공동대표 본인 | 별도 신청이 필요해요. [토스쇼핑 고객센터](https://toss-business.channel.io)로 문의해 주세요. |
| 대표가 아니에요 | 이 경로로 신청할 수 없어요. 법인 대표에게 본인 계정으로 신청하도록 요청해 주세요. |
**준비할 정보:** 최신 법인 사업자등록증, 법인 명의 은행 계좌, 세금계산서 안내를 받을 이메일
{% stepper %}
{% step %}
### ‘법인사업자’를 선택해요
사업자 유형에서 **법인사업자**를 선택하고, 필수 **토스쇼핑 쉐어링크 이용약관**을 확인한 뒤 동의해요. **다음**을 눌러요.
사업자 유형 선택과 약관 동의 · 안내용 예시 화면
{% endstep %}
{% step %}
### 대표 유형을 선택해요
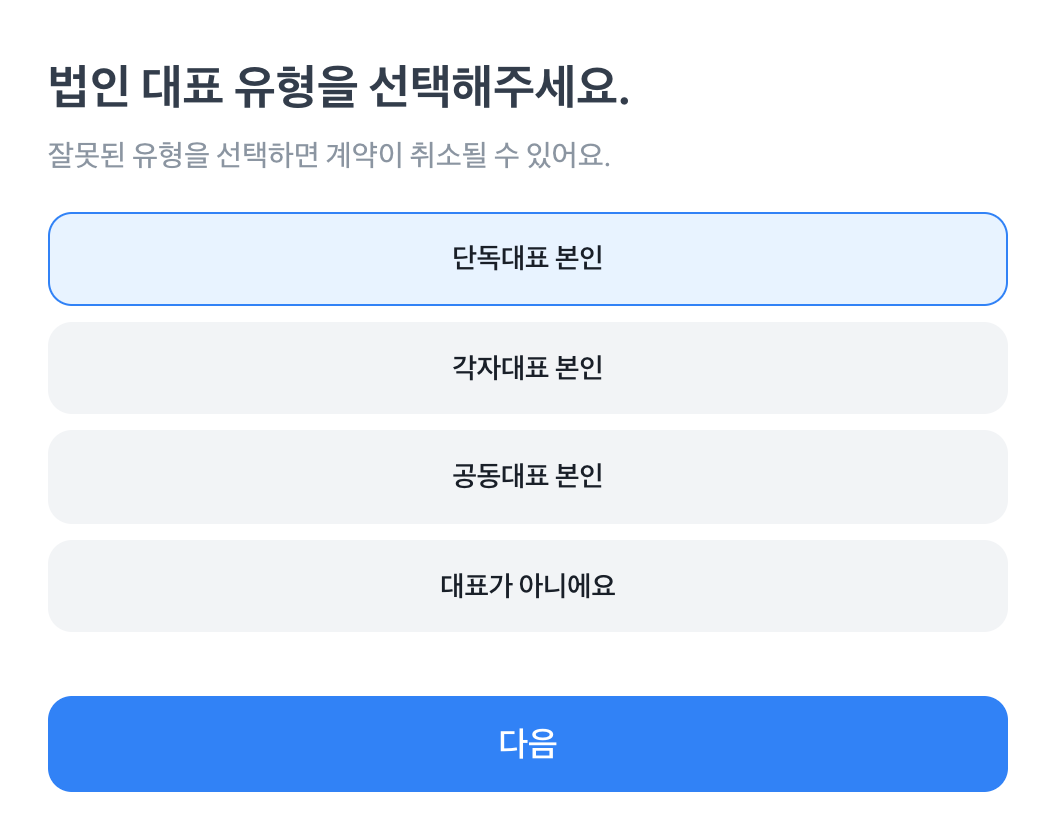
**단독대표 본인·각자대표 본인·공동대표 본인·대표가 아니에요** 중 본인에게 해당하는 항목을 선택해요.
법인 대표 유형 선택 · 안내용 예시 화면
단독대표·각자대표 본인은 다음 단계로 진행해요. 공동대표는 [토스쇼핑 고객센터](https://toss-business.channel.io)로 문의하고, 대표가 아니라면 법인 대표에게 직접 신청을 요청해 주세요.
{% endstep %}
{% step %}
### 사업자등록증을 올려요
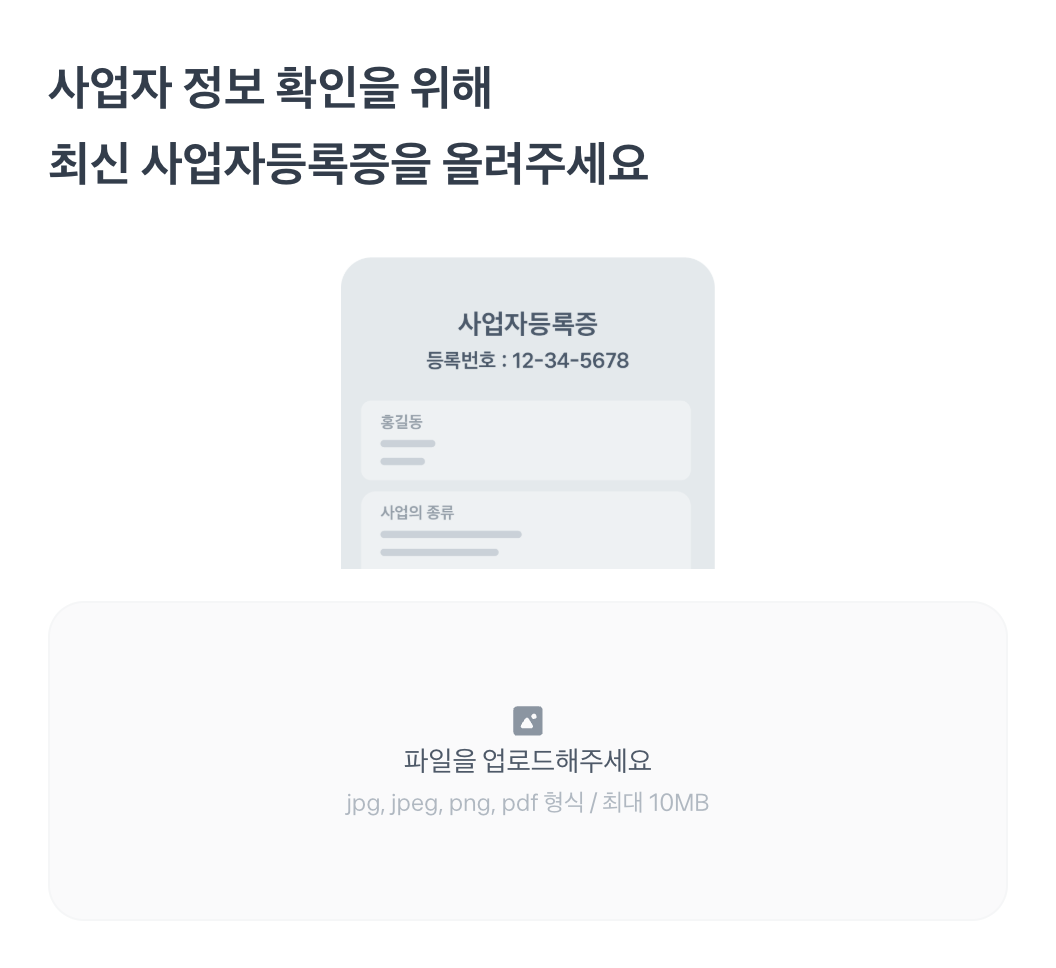
**파일 준비:** 가입할 사업자의 최신 사업자등록증을 준비해 주세요. **JPG·JPEG·PNG·PDF, 10MB 이하** 파일을 사용할 수 있어요.
글자가 잘 보이고 필요한 정보가 잘리지 않은 파일이어야 해요. 지원하지 않는 파일의 확장자만 바꾸면 업로드할 수 없어요.
**업로드:** 업로드 영역을 눌러 파일을 선택하거나 파일을 끌어다 놓아요. 사업자 정보를 자동으로 읽는 동안 기다려 주세요.
사업자등록증 업로드 · 안내용 예시 화면
{% endstep %}
{% step %}
### 사업자 정보를 확인해요
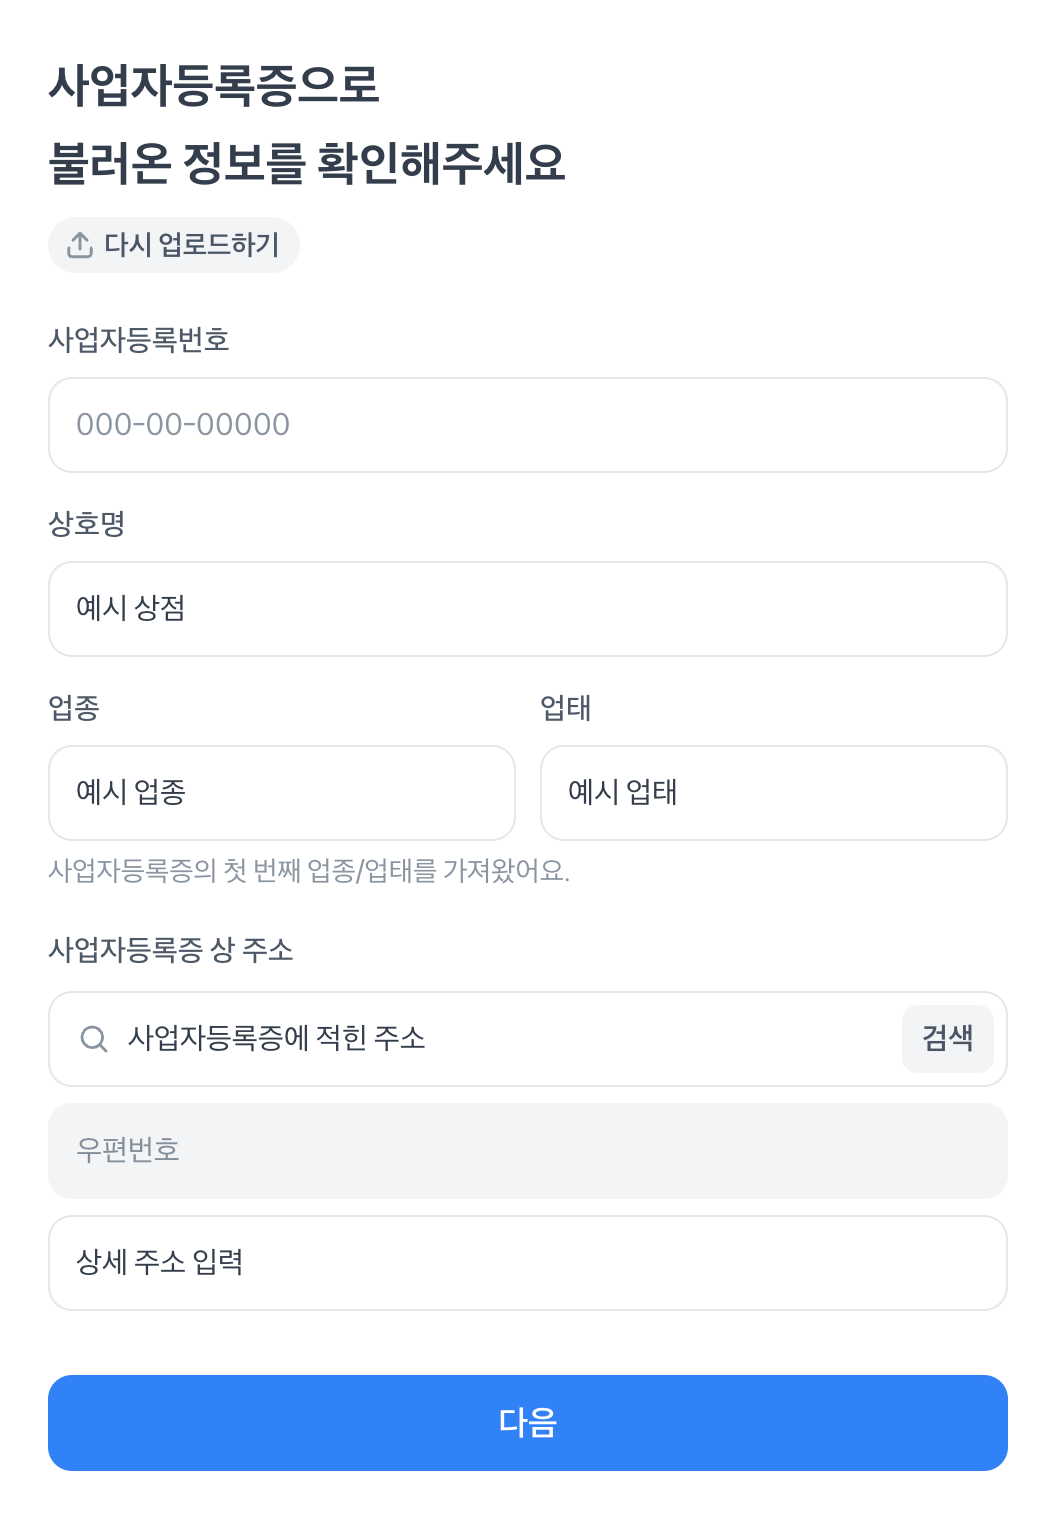
자동 입력된 내용이 사업자등록증과 같은지 확인해요. 틀리거나 비어 있는 항목은 직접 수정해 주세요.
사업자 정보 확인 · 안내용 예시 화면
| 입력 항목 | 확인할 내용 |
| ------------- | ------------------------------------------------- |
| 사업자등록번호 | 숫자 10자리가 정확한지 확인해요. |
| 상호명 | 사업자등록증에 적힌 상호명과 같은지 확인해요. |
| 업종 | 사업자등록증의 업종을 입력해요. 여러 개라면 첫 번째 항목을 입력해요. 최대 30자예요. |
| 업태 | 사업자등록증의 업태를 입력해요. 여러 개라면 첫 번째 항목을 입력해요. 최대 30자예요. |
| 사업자등록증에 적힌 주소 | **검색**을 눌러 건물명·지번·도로명으로 찾고 해당 주소를 선택해요. |
| 우편번호 | 주소를 선택하면 입력되는 우편번호를 확인해요. |
| 상세 주소 | 나머지 상세 주소를 입력해요. 빈칸으로 두지 않도록 확인해 주세요. |
모든 내용을 확인한 뒤 **다음**을 눌러 계좌 입력 단계로 이동해요.
사업자등록번호 확인 단계에서 오류가 계속되면 [가입 오류 해결 방법](/help/troubleshooting.md#signup)을 확인해 주세요. 오류를 피하려고 다른 번호나 가입 유형을 입력하지 마세요.
사업자등록증을 다른 파일로 바꾸고 싶어요
정보 확인 화면에서 **다시 업로드하기**를 눌러 올바른 파일을 선택해요. 새 파일에서 읽은 정보도 다시 확인해 주세요.
**‘첨부한 파일을 찾을 수 없어요’ 안내가 나와도** 사업자등록증을 다시 올려 주세요. 입력한 정보가 맞는지 확인한 뒤 다시 제출해요.
정보를 일부 읽지 못했다는 안내가 나와요
자동으로 읽지 못한 항목은 직접 입력하면 돼요. 이미 채워진 내용도 사업자등록증과 비교해 확인해 주세요.
사업자등록증 인식에 실패했어요
직접 입력하라는 안내가 나타나면 사업자등록증을 보면서 정보를 입력해 주세요. 잘못된 파일을 올렸다면 **다시 업로드하기**로 교체해요.
{% endstep %}
{% step %}
### 법인 명의 계좌를 입력해요
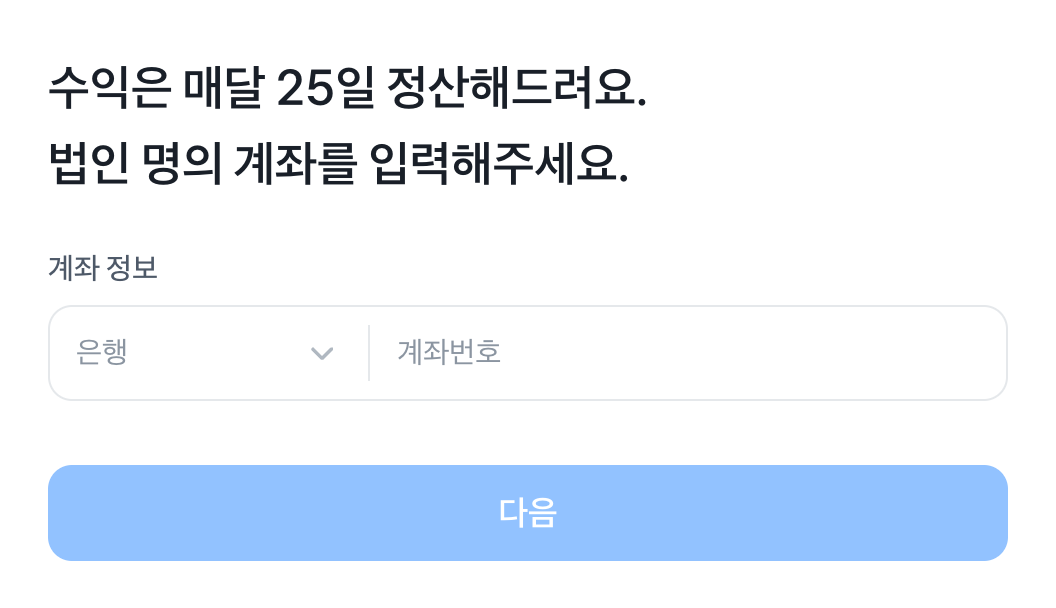
수익금을 받을 **법인 명의 계좌**의 은행과 계좌번호를 입력해요. 대표자 개인 계좌와 혼동하지 않도록 확인한 뒤 **다음**을 눌러요.
법인 명의 계좌 입력 · 안내용 예시 화면
계좌 입력 후 오류가 나요
선택한 은행과 계좌번호가 정확한지, **법인 명의 계좌**인지 확인해 주세요. 화면에 표시된 오류에 따라 입력한 정보를 수정한 뒤 다시 진행해요.
은행 점검 안내가 나타나거나 오류가 계속된다면 [가입 관련 문제 해결 방법](/help/troubleshooting.md#signup)을 확인해 주세요. 문의 내용이나 캡처에는 주민등록번호와 전체 계좌번호를 포함하지 마세요.
{% endstep %}
{% step %}
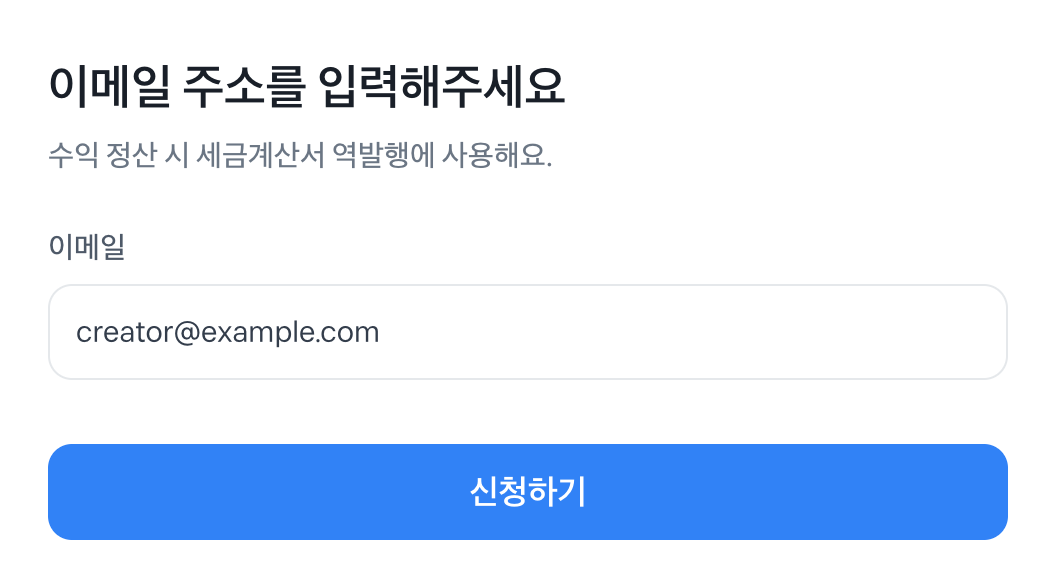
### 이메일을 입력하고 신청해요
세금계산서 역발행에 사용할 이메일을 입력해요. 담당자가 확인할 수 있는 주소인지 점검한 뒤 **신청하기**를 눌러요.
세금계산서 안내용 이메일 입력 · 안내용 예시 화면
오류가 나타나면 해당 내용을 수정한 뒤 다시 제출해 주세요.
{% endstep %}
{% endstepper %}
### 신청 후 확인하기
**‘회원가입을 축하해요’가 보이면 가입이 완료된 거예요.** 이어지는 안내를 확인한 뒤, [크리에이터명과 활동 채널을 등록](/start/channels.md)하고 [첫 링크를 만들어 보세요](/create-sharelink.md).
‘신청 정보를 심사하고 있어요’가 보여요
신청 정보를 확인하고 있는 상태예요. 화면에는 **영업일 기준 2일 안에 이메일로 결과를 안내**한다고 표시돼요. 신청할 때 입력한 이메일을 확인하고, 결과가 나오기 전에는 같은 내용으로 다시 신청하지 마세요.
‘크리에이터 신청이 반려되었어요’가 보여요
신청할 때 입력한 이메일에서 반려 사유를 확인해요. **다시 신청하기**를 눌러 해당 내용을 수정한 뒤 다시 제출해 주세요. 반려 사유나 결과를 찾을 수 없다면 아래 **가입 중 문제 해결하기**를 확인해 주세요.
크리에이터명과 채널 등록하기가입 중 문제 해결하기공동대표이거나 별도 신청이 필요한가요?
공동대표이거나 가입 화면에 별도 신청 안내가 나타났다면, 일반 가입 경로에서 계속 진행하지 말고 **토스쇼핑 고객센터로 바로 문의해 주세요.**
토스쇼핑 고객센터로 문의하기
---
# Agent Instructions
This documentation is published with GitBook. GitBook is the documentation platform designed so that both humans and AI agents can read, navigate, and reason over technical content effectively. Learn more at gitbook.com.
## Querying This Documentation
If you need additional information that is not directly available in this page, you can query the documentation dynamically by asking a question.
Perform an HTTP GET request on the current page URL with the `ask` query parameter, and the optional `goal` query parameter:
```
GET https://sharelink-docs.toss.im/start/corporation.md?ask=&goal=
```
`ask` is the immediate question: it should be specific, self-contained, and written in natural language.
`goal` is optional and describes the broader end goal you are ultimately trying to accomplish on behalf of the user. GitBook uses it to tailor the answer towards what is most useful for that goal.
The response will contain a direct answer to the question and relevant excerpts and sources from the documentation.
Use this mechanism when the answer is not explicitly present in the current page, you need clarification or additional context, or you want to retrieve related documentation sections.